Hey Netlyer?!
Ever wondering why your DNS keep leaking even when you are connected via VPN on Windows configuration?
Well, you can find the answer by reading the article here, enjoy.
The leak is caused by the network service in Windows picks up the DNS based on a network adapter list order.
Here is how to change the order of DNS lookup when connected in the VPN
Unfortunately only the first 3 network adapters in the network service’s list will be taken into consideration. Depending on how many network adapters you have on your PC, the OpenVPN’s network adapter (TAP adapter) can be the 4th or even lower on the list.
What you need to do is move the OpenVPN adapter amoung the first 3.
This is how you can do it:
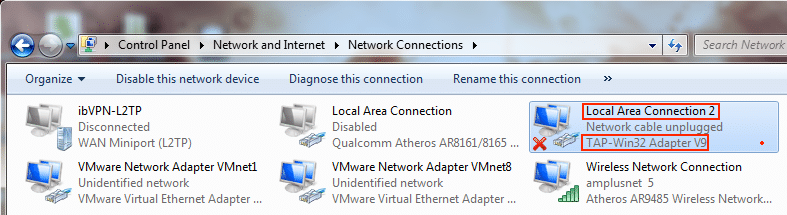
Step 1. Open Network Connections;

Step 2. Check TAP-32 (OpenVPN) network adapter’s name: Local Area Connection 2 in this case (you might have a different name), remeber this name for Step 4.
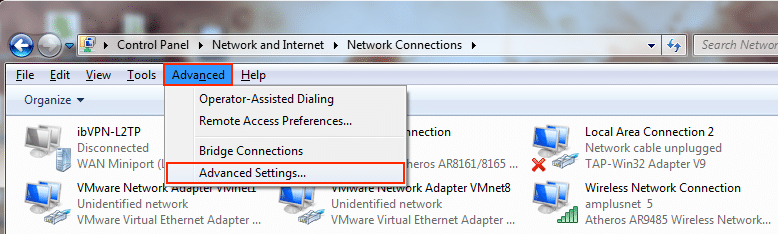
Step 3. Press ALT key. The Network Connection menu will be showed. Click on Advanced and then on Advanced Settings;
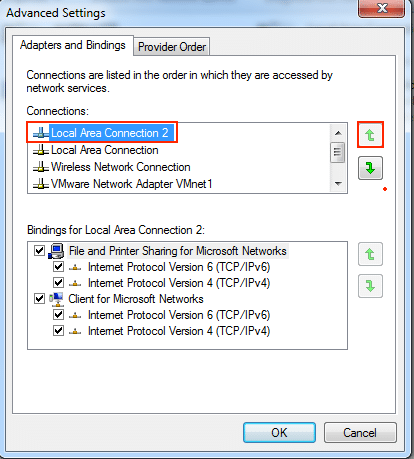
Step 4. Locate your OpenVPN connection, Local Area Connection 2 in this case and move it up (using the up arrow icon), 1st place is recommended.
Done. You’ll be using OpenVPN’s DNS address from now on, once connected to a VPN server.
On OpenVPN v2.3.9+
As of OpenVPN version 2.3.9 you can now prevent DNS leaks by specifying a new OpenVPN option. Simply open the .conf (or .ovpn) file for the server that you are connecting to and add the following on a new line. For more information see the OpenVPN manual.
block-outside-dns
If for any reason you are unable to use the solution above continue reading.
If you are using a version of OpenVPN older than v2.3.9
Please note that as this problem normally only affects windows clients, only solutions for Windows appear here.
3 basic steps to fix the problem;
- Before connecting to the VPN, set static IP address properties if you are using DHCP
- After connecting, remove DNS settings for the primary interface
- After disconnecting, switch back to DHCP if neccessary or reapply original static DNS servers