This post is primarily intended as a basic step-by-step tutorial for configuring Cloudflare Zero Trust. I’ll be using WordPress security as an example, but the same principles go for other web applications as well. Inspired by the LowEndSpirit forum topic Setting up Cloudflare Zero Trust.
Table Of Contents (T.O.C.):
- What is Cloudflare Zero Trust
- Cloudflare Zero Trust menu
- Adding a Zero Trust protected application
- Logging in via Zero Trust OTP
- Conclusion
1. What is Cloudflare Zero Trust
I wrote separate articles explaining what Cloudflare is, how to configure Cloudflare DNS, and how to configure Cloudflare for WordPress. Here, I’ll talk about the specific service offered by Cloudflare, called: Zero Trust. This tutorial is written with the presumption that you have configured Cloudflare properly.
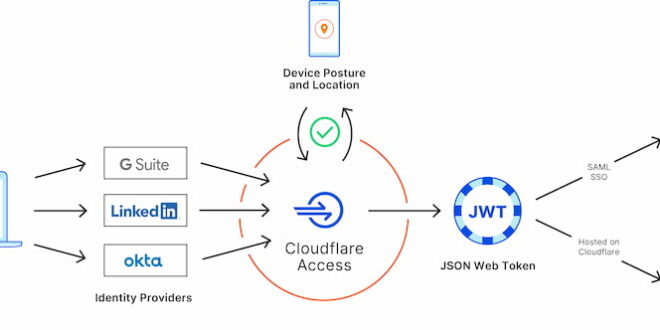
It’s basically an advanced firewall and identity aggregator, that allows you to configure authentication for users before they can reach your web application. This allows you to fine-tune who can access what in your organization. In a bit more detail, it lets you configure stuff so that even people inside your organization/system get regular checks and are required to authenticate.
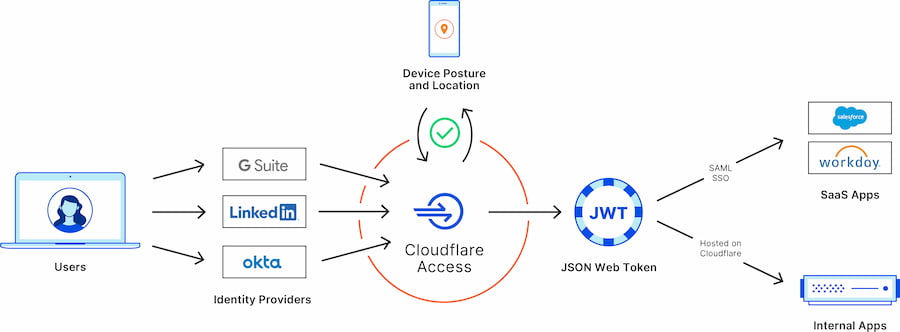
Picture 1
If configured properly, it lets you prevent a scenario where a social engineering attack allows a bad guy drunk Serb to gain access to your entire network without any boundaries.
If this is done wrongly (not good enough), it can result in either of these two extremes (one not necessarily excluding the other):
- Your entire system gets pawned – as we saw happen with Uber recently.
- Your system gets frustratingly unusable due to constant requests for authentication, and/or some functions get blocked even for users who should be allowed (authorized) to access them.
Here you can read Cloudflare’s article on how they implement security (these guys are quite good at this stuff as far as I can tell): The mechanics of a sophisticated phishing scam and how we stopped it.
Note, this tutorial will cover only a very basic use case – though it is a use case that might help a huge number of people.
2. Cloudflare Zero Trust menu
I like when people give me a real example in order to explain, so here I’ll use a practical example. Our goal: secure all the wonderful WordPress websites on the bikegremlin.com domain (BikeGremlin HUB link).
This includes preventing access to the /wp-login.php path for any subdomain (www.bikegremlin.com/wp-login.php, io.bikegremlin.com/wp-login.php, etc).
To start, we’ll log in to Cloudflare, and click on the “Zero Trust” link.
Alternatively, if you have already entered the menu for your domain, you can reach Zero Trust by clicking on the “Access” option, as shown in the picture below:

Picture 2
Now, Cloudflare asks me which one of my failed projects accounts I wish to play with:
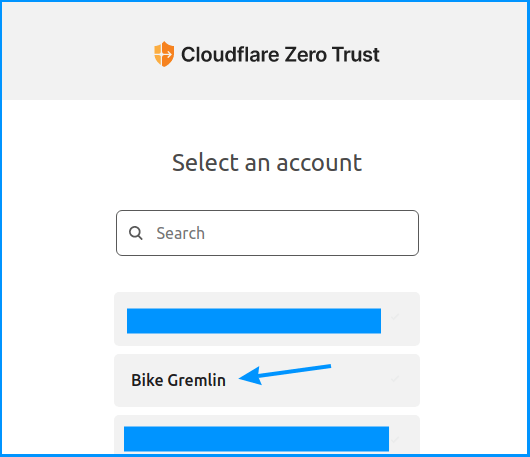
Picture 3
3. Adding a Zero Trust protected application
Now, let’s see how to configure the Zero Trust protection for our apps. We’ll click on the “Add an application” button:
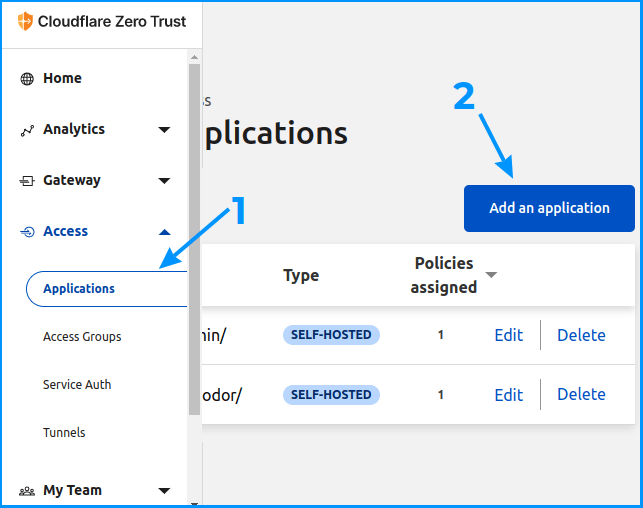
Picture 4
Now we need to select what type of application we wish to protect – we’ll go with the “Self-hosted” option:
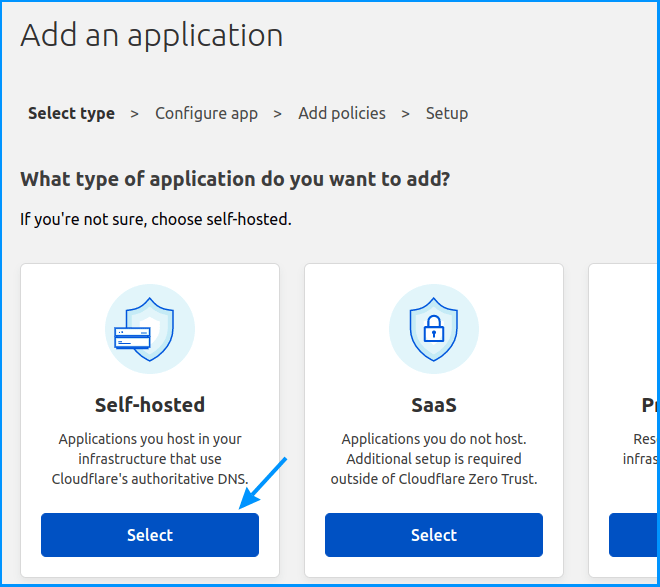
Picture 5
We’ll now configure protection with 1 month token expiry time, and protect the wp-login.php path of any bikegremlin.com subdomain.
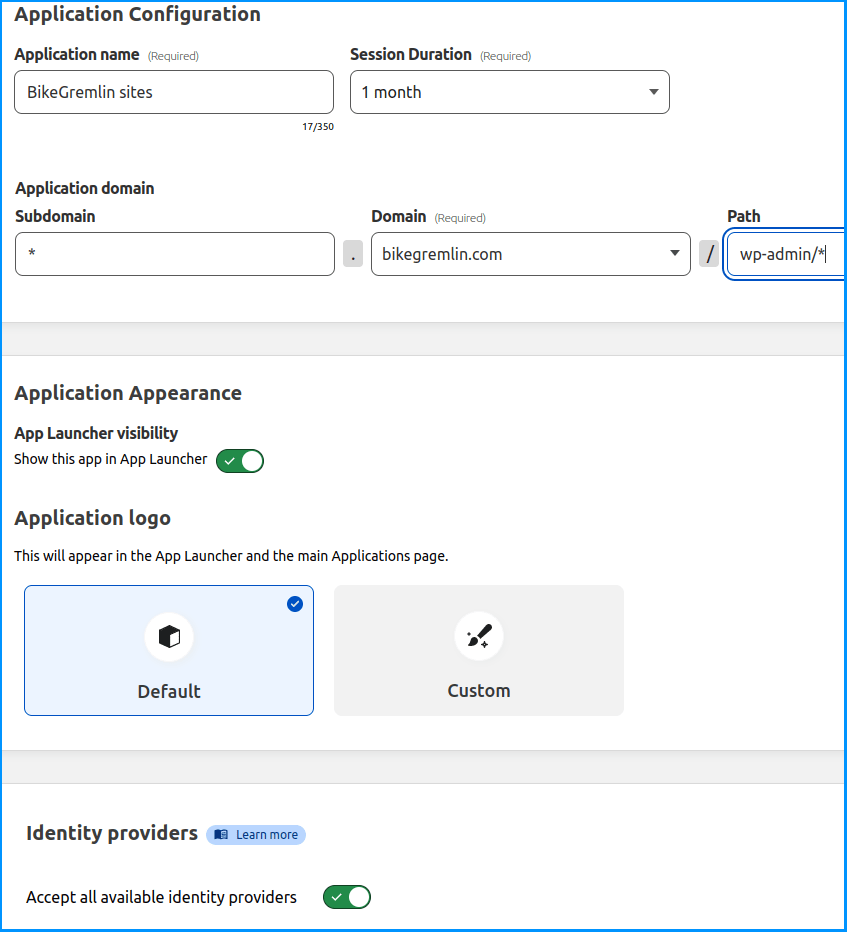
Picture 6
Note that an asterisk can’t be used to cover a part of a subdomain or a part of a path. So, you can’t configure “dev-*” to cover any “dev-one”, “dev-two” etc subdomain. Only a particular subdomain (or just an asterisk for every possible subdomain) works. This is a problem and Cloudflare should address it.
Likewise, you can’t use a “wp-*” path to protect both the “wp-login.php” and the “wp-admin” path. Only a whole “path section” can be used, such as: “wp-admin/*”.
Update – April 2023:
From April 20th, 2023, the asterisk (“wildcard”) function will change to work more logically. So:
“example.com/alpha*” will now cover “example.com/alpha“, “example.com/alpha/one“, and “example.com/alphabet“.
This is a logical way the asterisk (“wildcard”) should work, as it should have been from the start – so, a change for the better in my opinion.
The relevant LowEndSpirit forum discussion thread about the Cloudflare Zero Trust wildcard change.
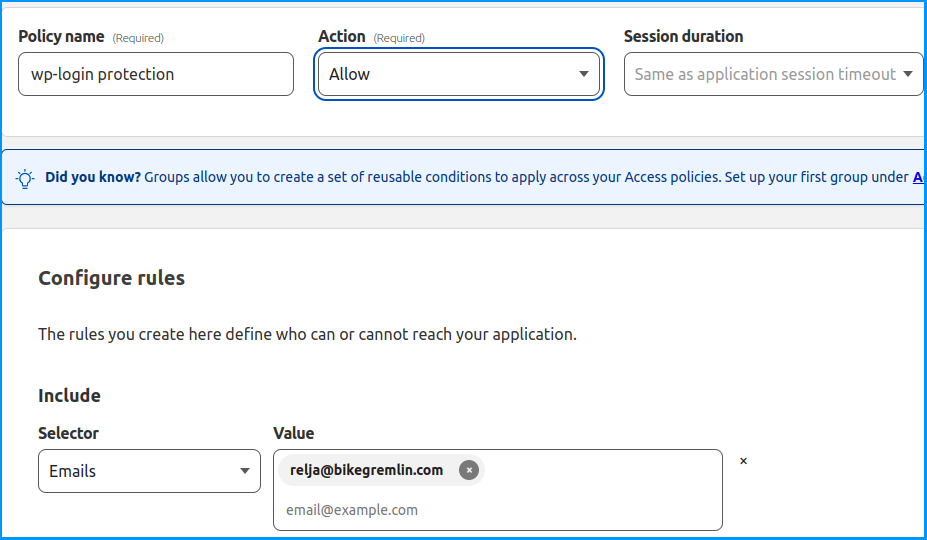
Next, we need to configure the security policy. We’ll set it to Allow authenticated users to access, using an authentication token expiry length the same as we had configured in our previous menu (this can be altered of course). We’ll add an email address to which an OTP will be sent (here one can add several email addresses):
Picture 7
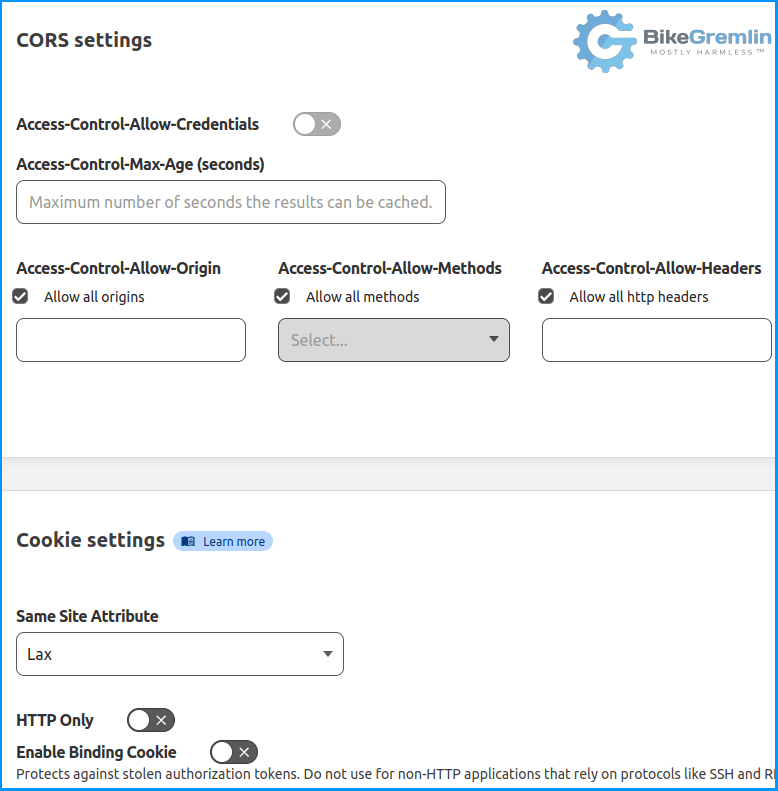
Finally, we need to configure the Cross-Origin Resource Sharing (CORS) settings. As the general idea is to allow access via the OTP token from any browser and location, we’ll configure this as lax as possible:
Picture 8
In order to protect WordPress login, we would need to create another rule, similar to this one, except that the “wp-admin/*” path (as shown in picture 6) would need to be replaced with “wp-login.php*”.
4. Logging in via Zero Trust OTP
Now, in order to access any path containing the “bikegremlin.com” domain and the “/wp-admin/” directory, we’ll need to enter a valid email (one listed under the policy – as shown in picture 7).
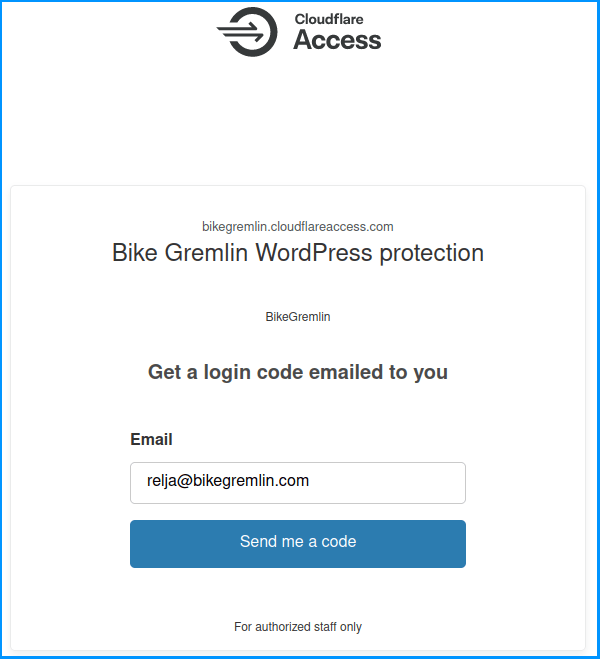
Picture 9
After having clicked the “Send me a code” button, we’ll need to check that email for the code, and enter it:
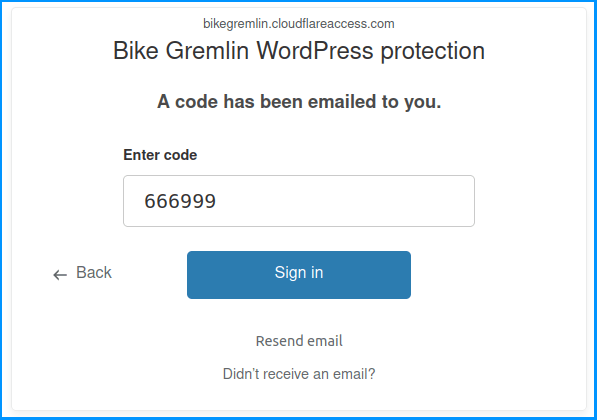
Picture 10
5. Conclusion
For me, Zero Trust is a relatively new service I haven’t got a ton of experience with. While it is not the most difficult thing to configure, it is also far from simple and intuitive.
Hence, one of the reasons for making this article is to get feedback and potential corrections from experts (why I like writing these articles).
Based on my experience so far, Zero Trust is a good way of adding a security layer, hence increasing the security, without too much extra inconvenience (see my article about domain and website security for more details on this). It can be used to configure different access tiers within your organization. Figuring out how to automate user provisioning via APIs (so you can fire 100 people without worrying they’ll have access to your apps) is beyond my level of knowledge and experience.
As far as I know, Google Authenticator, Authy, and similar apps can be used with Cloudflare zero trust instead of (or in addition to) using an email. I haven’t tested this yet for reasons that are beyond the scope of this article, though technically, in my opinion, it is a bit more secure than using email for OTP.
You read this on Netly.win