Pada postingan ini, kita akan membahas mengenai langkah-langkah instalasi Nextcloud di NAT VPS, yang menggunakan OS Linux Ubuntu 20.04. Nextcloud adalah sebuah cloud storage platform, seperti Google Drive, OneDrive, dan Dropbox. Client server Nextcloud dapat di-deploy sendiri (self-hosted) di server Anda, termasuk NAT VPS.
Mengingat Nextcloud adalah sebuah cloud storage platform, maka server harus memiliki penyimpanan yang cukup untuk menampung data!
Command untuk instalasi akan lebih panjang dari artikel-artikel sebelumnya. Harap gunakan fitur copy-paste (ikon kertas) pada code snippet!
Instalasi Package Yang Diperlukan
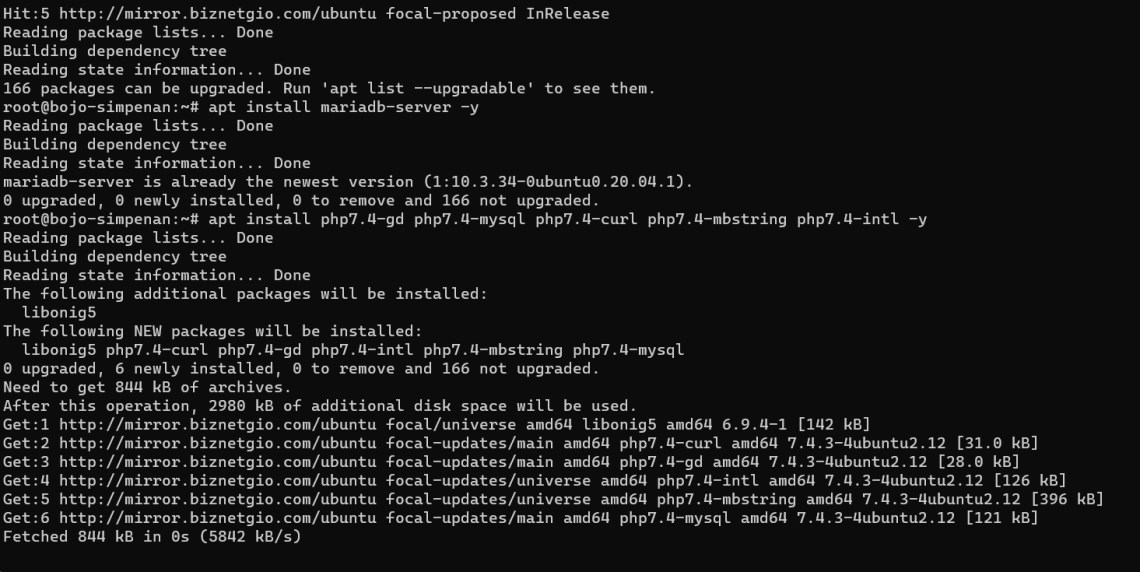
Sebelum memulai instalasi, kita perlu memasang package-package yang diperlukan untuk menjalankan Nextcloud. Masukkan command berikut:
apt update
apt install mariadb-server -y
apt install php7.4-gd php7.4-mysql php7.4-curl php7.4-mbstring php7.4-intl -y
apt install php7.4-gmp php7.4-bcmath php-imagick php7.4-xml php7.4-zip php7.4-fpm -y
Untuk memastikan bahwa package telah dipasang, maka jalankan command di atas sebanyak 2-3 kali!
Pengaturan MariaDB
Konfigurasi MariaDB perlu dilakukan untuk penyimpanan kredensial akun Nextcloud. Setelah memasang package-package di atas, masukkan command berikut untuk memulai dan masuk ke command line MariaDB:
/etc/init.d/mysql start
mysql -uroot -p

Tekan Enter (kosong) jika ditanyai password lalu masukkan command berikut, dengan mengganti username menjadi nama pengguna MariaDB dan password sebagai kata sandi pengguna MariaDB Anda (semuanya bebas):
Jangan lupa titik-koma!
CREATE USER 'username'@'localhost' IDENTIFIED BY 'password';
CREATE DATABASE IF NOT EXISTS nextcloud CHARACTER SET utf8mb4 COLLATE utf8mb4_general_ci;
GRANT ALL PRIVILEGES ON nextcloud.* TO 'username'@'localhost';
FLUSH PRIVILEGES;
Keluar dari command line MariaDB dengan cara mengetikkan:
quit;
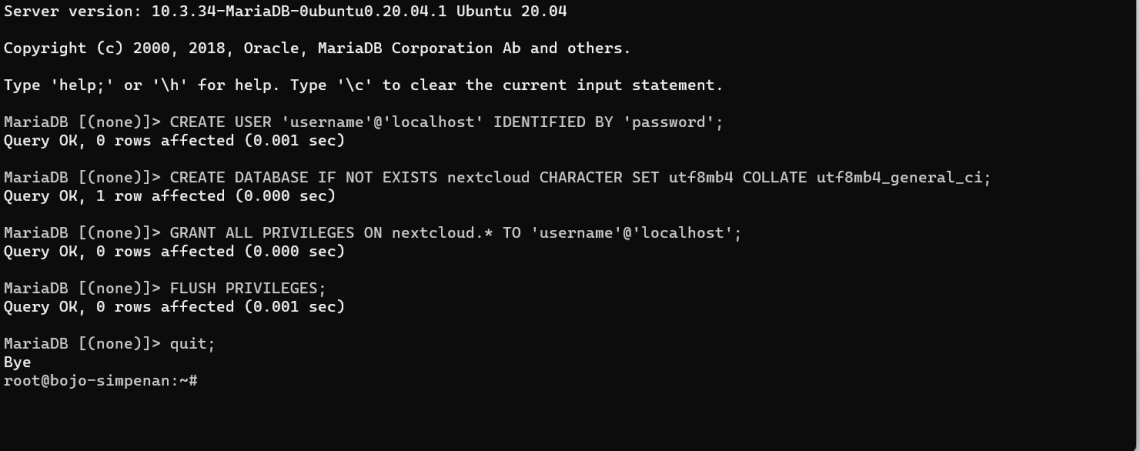
Harap catat nama pengguna dan password, karena akan diperlukan nantinya.
Instalasi Nextcloud dan NGINX
Mari masuk ke “acara” inti, yaitu proses instalasi Nextcloud beserta NGINX sebagai web server, reverse proxy dan SSL handling.
Instalasi Nextcloud
Masukkan command berikut untuk mengunduh dan memasang Nextcloud:
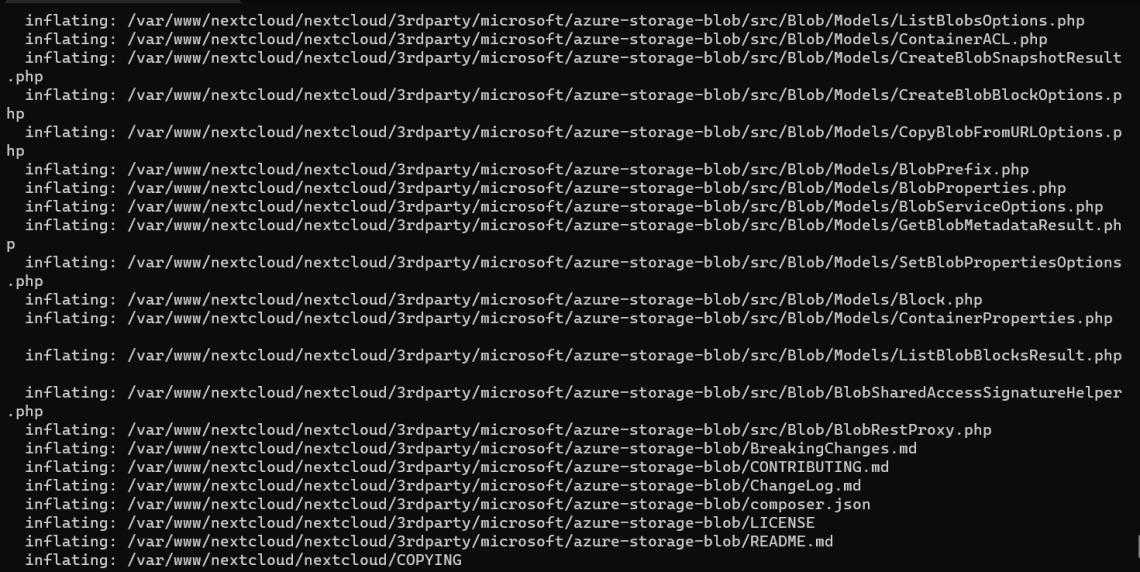
wget https://download.nextcloud.com/server/releases/latest.zip
unzip latest.zip -d /var/www
rm latest.zip
chown -R www-data:www-data /var/www/nextcloud
Command di atas akan mengunduh arsip ZIP Nextcloud dan mengekstraknya ke /var/www, yang akan menghasilkan direktori /var/www/nextcloud, serta mengatur permission dari direktori tersebut.
Instalasi dan Konfigurasi NGINX + SSL Let’s Encrypt
Nextcloud telah dipasang, namun belum bisa diakses dari luar karena belum adanya web server untuk itu. Serta, protokol SSL (HTTPS) perlu dipasang untuk lebih menjamin keamanan server.
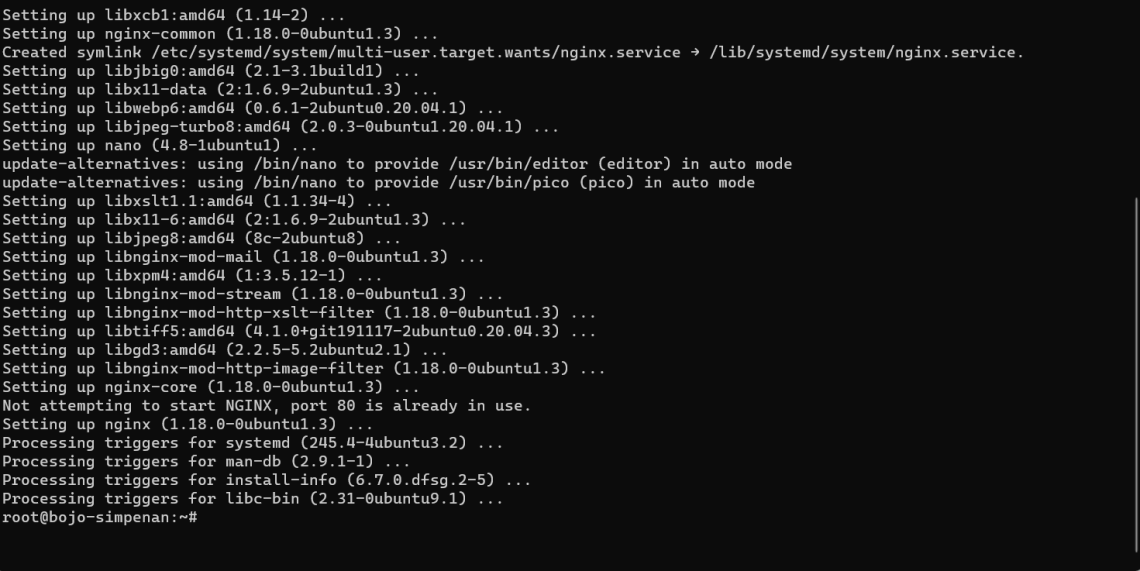
Pasang NGINX dan Nano (text editor) dengan cara memasukkan command berikut:
apt install nginx nano -y
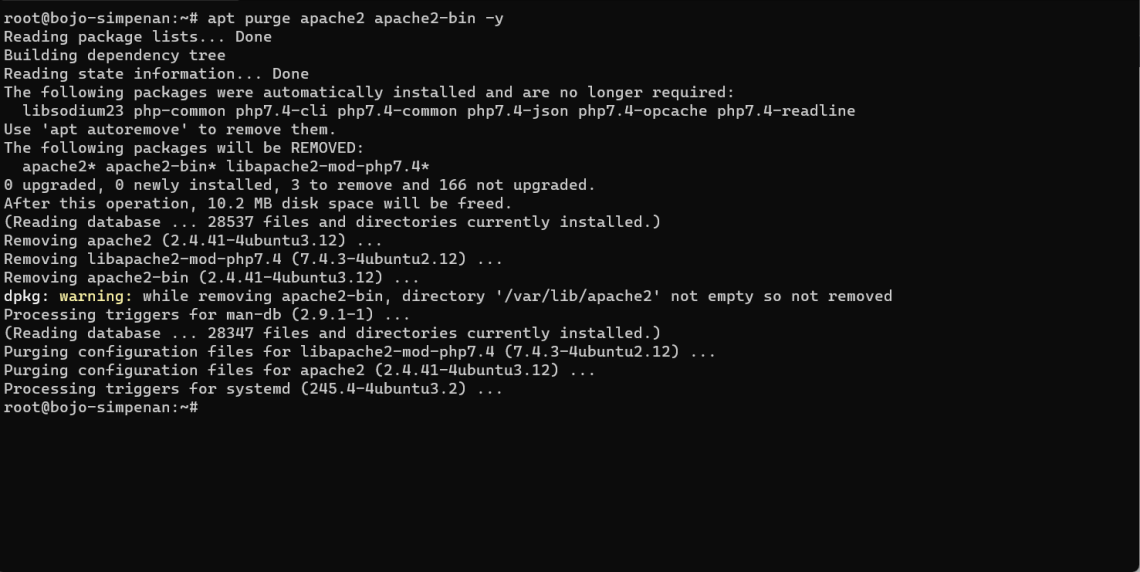
Hapus juga package Apache2 agar tidak bertabrakan dengan NGINX:
apt purge apache2 apache2-bin -y
Lanjut ke pembuatan Virtual Host. Buat file /etc/nginx/sites-available/nextcloud menggunakan Nano:
nano /etc/nginx/sites-available/nextcloud
Lalu, paste-kan konfigurasi NGINX dibawah, dengan mengganti cloud.example.com (line 15 dan 27) ke domain Anda:
upstream php-handler {
    server unix:/var/run/php/php7.4-fpm.sock;
}

# Set the `immutable` cache control options only for assets with a cache busting `v` argument
map $arg_v $asset_immutable {
    "" "";
    default "immutable";
}


server {
    listen 80;
    listen [::]:80;
    server_name cloud.example.com;

    # Prevent nginx HTTP Server Detection
    server_tokens off;

    # Enforce HTTPS
    return 301 https://$server_name$request_uri;
}

server {
    listen 443      ssl http2;
    listen [::]:443 ssl http2;
    server_name cloud.example.com;

    # Path to the root of your installation
    root /var/www/nextcloud;

    # Use Mozilla's guidelines for SSL/TLS settings
    # https://mozilla.github.io/server-side-tls/ssl-config-generator/
    ssl_certificate     /etc/ssl/nginx/cloud.example.com.crt;
    ssl_certificate_key /etc/ssl/nginx/cloud.example.com.key;

    # Prevent nginx HTTP Server Detection
    server_tokens off;

    # HSTS settings
    # WARNING: Only add the preload option once you read about
    # the consequences in https://hstspreload.org/. This option
    # will add the domain to a hardcoded list that is shipped
    # in all major browsers and getting removed from this list
    # could take several months.
    #add_header Strict-Transport-Security "max-age=15768000; includeSubDomains; preload;" always;

    # set max upload size and increase upload timeout:
    client_max_body_size 512M;
    client_body_timeout 300s;
    fastcgi_buffers 64 4K;

    # Enable gzip but do not remove ETag headers
    gzip on;
    gzip_vary on;
    gzip_comp_level 4;
    gzip_min_length 256;
    gzip_proxied expired no-cache no-store private no_last_modified no_etag auth;
    gzip_types application/atom+xml application/javascript application/json application/ld+json application/manifest+json application/rss+xml application/vnd.geo+json application/vnd.ms-fontobject application/wasm application/x-font-ttf application/x-web-app-manifest+json application/xhtml+xml application/xml font/opentype image/bmp image/svg+xml image/x-icon text/cache-manifest text/css text/plain text/vcard text/vnd.rim.location.xloc text/vtt text/x-component text/x-cross-domain-policy;

    # Pagespeed is not supported by Nextcloud, so if your server is built
    # with the `ngx_pagespeed` module, uncomment this line to disable it.
    #pagespeed off;

    # The settings allows you to optimize the HTTP2 bandwitdth.
    # See https://blog.cloudflare.com/delivering-http-2-upload-speed-improvements/
    # for tunning hints
    client_body_buffer_size 512k;

    # HTTP response headers borrowed from Nextcloud `.htaccess`
    add_header Referrer-Policy                      "no-referrer"   always;
    add_header X-Content-Type-Options               "nosniff"       always;
    add_header X-Download-Options                   "noopen"        always;
    add_header X-Frame-Options                      "SAMEORIGIN"    always;
    add_header X-Permitted-Cross-Domain-Policies    "none"          always;
    add_header X-Robots-Tag                         "none"          always;
    add_header X-XSS-Protection                     "1; mode=block" always;

    # Remove X-Powered-By, which is an information leak
    fastcgi_hide_header X-Powered-By;

    # Specify how to handle directories -- specifying `/index.php$request_uri`
    # here as the fallback means that Nginx always exhibits the desired behaviour
    # when a client requests a path that corresponds to a directory that exists
    # on the server. In particular, if that directory contains an index.php file,
    # that file is correctly served; if it doesn't, then the request is passed to
    # the front-end controller. This consistent behaviour means that we don't need
    # to specify custom rules for certain paths (e.g. images and other assets,
    # `/updater`, `/ocm-provider`, `/ocs-provider`), and thus
    # `try_files $uri $uri/ /index.php$request_uri`
    # always provides the desired behaviour.
    index index.php index.html /index.php$request_uri;

    # Rule borrowed from `.htaccess` to handle Microsoft DAV clients
    location = / {
        if ( $http_user_agent ~ ^DavClnt ) {
            return 302 /remote.php/webdav/$is_args$args;
        }
    }

    location = /robots.txt {
        allow all;
        log_not_found off;
        access_log off;
    }

    # Make a regex exception for `/.well-known` so that clients can still
    # access it despite the existence of the regex rule
    # `location ~ /(\.|autotest|...)` which would otherwise handle requests
    # for `/.well-known`.
    location ^~ /.well-known {
        # The rules in this block are an adaptation of the rules
        # in `.htaccess` that concern `/.well-known`.

        location = /.well-known/carddav { return 301 /remote.php/dav/; }
        location = /.well-known/caldav  { return 301 /remote.php/dav/; }

        location /.well-known/acme-challenge    { try_files $uri $uri/ =404; }
        location /.well-known/pki-validation    { try_files $uri $uri/ =404; }

        # Let Nextcloud's API for `/.well-known` URIs handle all other
        # requests by passing them to the front-end controller.
        return 301 /index.php$request_uri;
    }

    # Rules borrowed from `.htaccess` to hide certain paths from clients
    location ~ ^/(?:build|tests|config|lib|3rdparty|templates|data)(?:$|/)  { return 404; }
    location ~ ^/(?:\.|autotest|occ|issue|indie|db_|console)                { return 404; }

    # Ensure this block, which passes PHP files to the PHP process, is above the blocks
    # which handle static assets (as seen below). If this block is not declared first,
    # then Nginx will encounter an infinite rewriting loop when it prepends `/index.php`
    # to the URI, resulting in a HTTP 500 error response.
    location ~ \.php(?:$|/) {
        # Required for legacy support
        rewrite ^/(?!index|remote|public|cron|core\/ajax\/update|status|ocs\/v[12]|updater\/.+|oc[ms]-provider\/.+|.+\/richdocumentscode\/proxy) /index.php$request_uri;

        fastcgi_split_path_info ^(.+?\.php)(/.*)$;
        set $path_info $fastcgi_path_info;

        try_files $fastcgi_script_name =404;

        include fastcgi_params;
        fastcgi_param SCRIPT_FILENAME $document_root$fastcgi_script_name;
        fastcgi_param PATH_INFO $path_info;
        fastcgi_param HTTPS on;

        fastcgi_param modHeadersAvailable true;         # Avoid sending the security headers twice
        fastcgi_param front_controller_active true;     # Enable pretty urls
        fastcgi_pass php-handler;

        fastcgi_intercept_errors on;
        fastcgi_request_buffering off;

        fastcgi_max_temp_file_size 0;
    }

    location ~ \.(?:css|js|svg|gif|png|jpg|ico|wasm|tflite|map)$ {
        try_files $uri /index.php$request_uri;
        add_header Cache-Control "public, max-age=15778463, $asset_immutable";
        access_log off;     # Optional: Don't log access to assets

        location ~ \.wasm$ {
            default_type application/wasm;
        }
    }

    location ~ \.woff2?$ {
        try_files $uri /index.php$request_uri;
        expires 7d;         # Cache-Control policy borrowed from `.htaccess`
        access_log off;     # Optional: Don't log access to assets
    }

    # Rule borrowed from `.htaccess`
    location /remote {
        return 301 /remote.php$request_uri;
    }

    location / {
        try_files $uri $uri/ /index.php$request_uri;
    }
}
Simpan file tersebut dengan menekan Ctrl + X, y, lalu Enter.
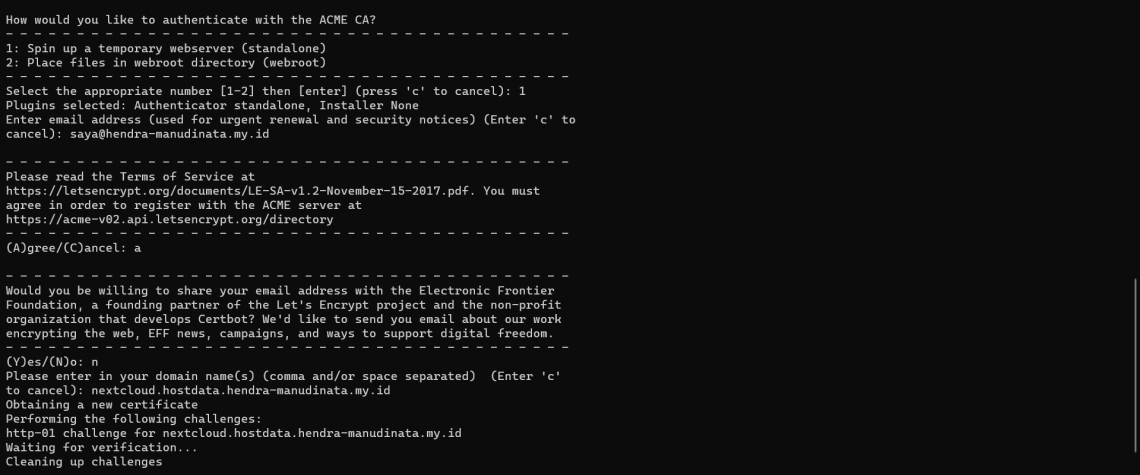
Belum selesai, kita perlu melakukan issue sertifikat SSL dari Let’s Encrypt lalu mengaplikasikannya ke NGINX untuk mendukung HTTPS. Masukkan command berikut untuk memasang Certbot dan melakukan issue sertifikat SSL:
apt install certbot -y
certbot certonly
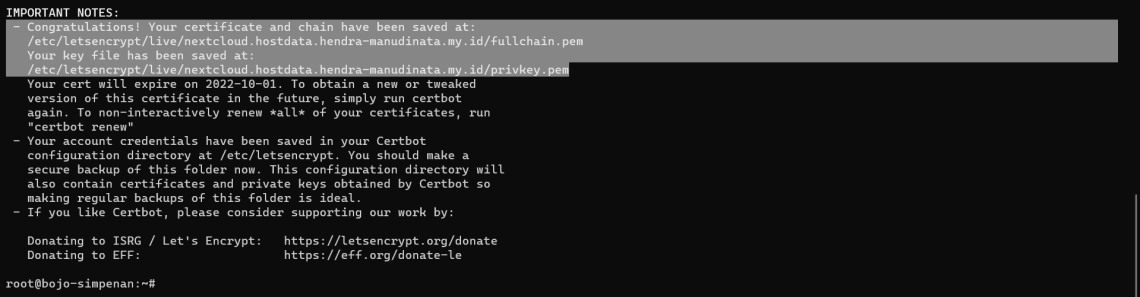
Isi pertanyaan yang ditanya, lalu tunggu proses verifikasi domain. Jika sukses, maka sertifikat akan berada di /etc/letsencrypt/live/domain-anda.tld/fullchain.pem dan /etc/letsencrypt/live/domain-anda.tld/privkey.pem.
Kembali lagi ke konfigurasi NGINX di atas, pada line 34 dan 35:

Ganti /etc/ssl/nginx/cloud.example.com.crt menjadi /etc/letsencrypt/live/domain-anda.tld/fullchain.pem dan /etc/ssl/nginx/cloud.example.com.key menjadi /etc/letsencrypt/live/domain-anda.tld/privkey.pem. Jika sudah, maka akan menjadi seperti ini:
...
    # Use Mozilla's guidelines for SSL/TLS settings
    # https://mozilla.github.io/server-side-tls/ssl-config-generator/
    ssl_certificate /etc/letsencrypt/live/domain-anda.tld/fullchain.pem;
    ssl_certificate_key /etc/letsencrypt/live/domain-anda.tld/privkey.pem;
...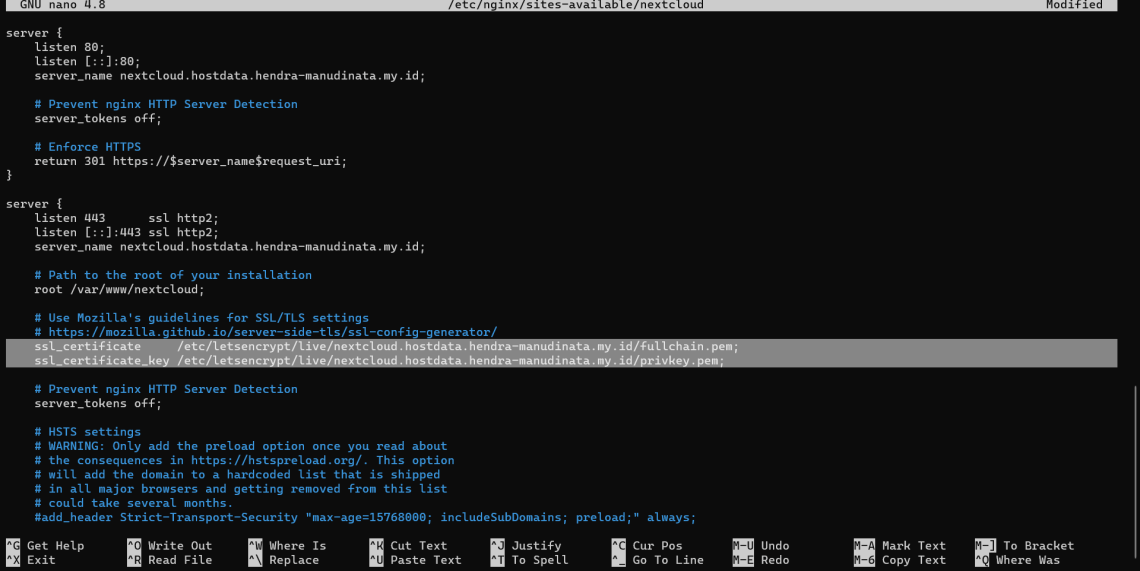
Simpan kembali file tersebut, lalu masukkan command berikut untuk mengaktifkan konfigurasi Virtual Host:
ln -s /etc/nginx/sites-available/nextcloud /etc/nginx/sites-enabled/nextcloud
Terakhir, restart NGINX untuk mengaktifkan perubahan:
systemctl restart nginx
Pengaturan Domain Forwarding
Seperti biasa, untuk NAT VPS, pengaturan Domain Forwarding perlu dilakukan agar web server dapat diakses melalui domain.
Atur konfigurasi Domain Forwarding seperti berikut:
- Protocol: HTTPS
- Source Domain: Domain Anda
- Source Port: 443
- Destination IP: IP lokal VPS
- Destination Port: 443
Lakukan hal yang sama untuk protokol HTTP (80).

Instalasi Akhir Nextcloud
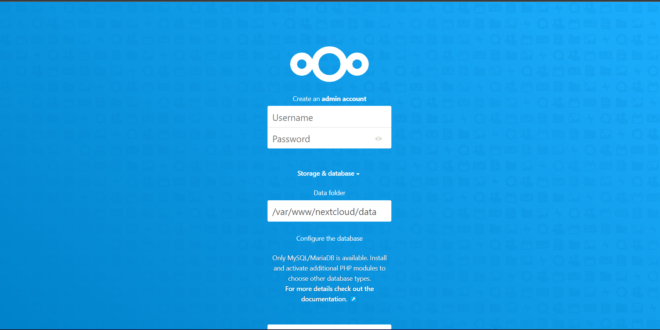
Instalasi Nextcloud dan NGINX telah selesai. Silahkan buka melalui domain Anda, misalnya nextcloud.hostdata.hendra-manudinata.my.id. Namun, Nextcloud memerlukan satu langkah lagi agar dapat dijalankan, yaitu instalasi akhir. Itu karena instalasi sebelumnya hanya mengunduh arsip ZIP Nextcloud, belum sampai memasangnya.
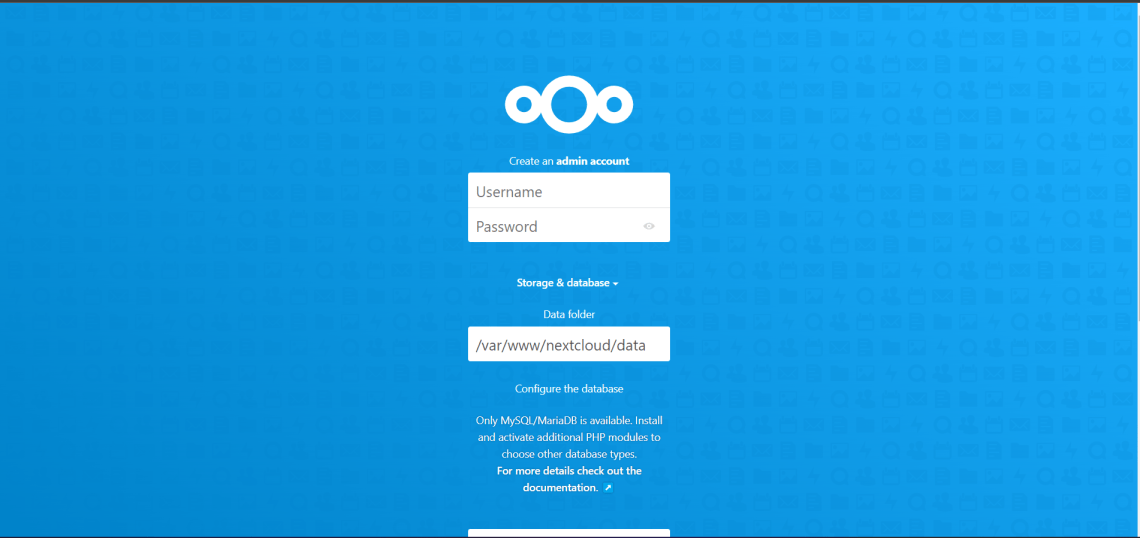
Isi konfigurasi seperti berikut:
- Username: Username untuk login ke Nextcloud, bebas
- Password: Password untuk login ke Nextcloud, bebas
- Database User: Nama pengguna MariaDB sebelumnya (langkah ke-2: Pengaturan MariaDB) (username)
- Database Password: Password pengguna MariaDB sebelumnya (langkah ke-2: Pengaturan MariaDB) (password)
- Database Name: nextcloud

Jika sudah, klik Install. Proses instalasi akan berjalan secara otomatis. Tunggu hingga selesai.
Jika ditanya mengenai instalasi recommended apps, pilih Cancel untuk mempersingkat waktu.
Selesai!
Nextcloud telah berhasil dipasang dan siap untuk digunakan. Hore!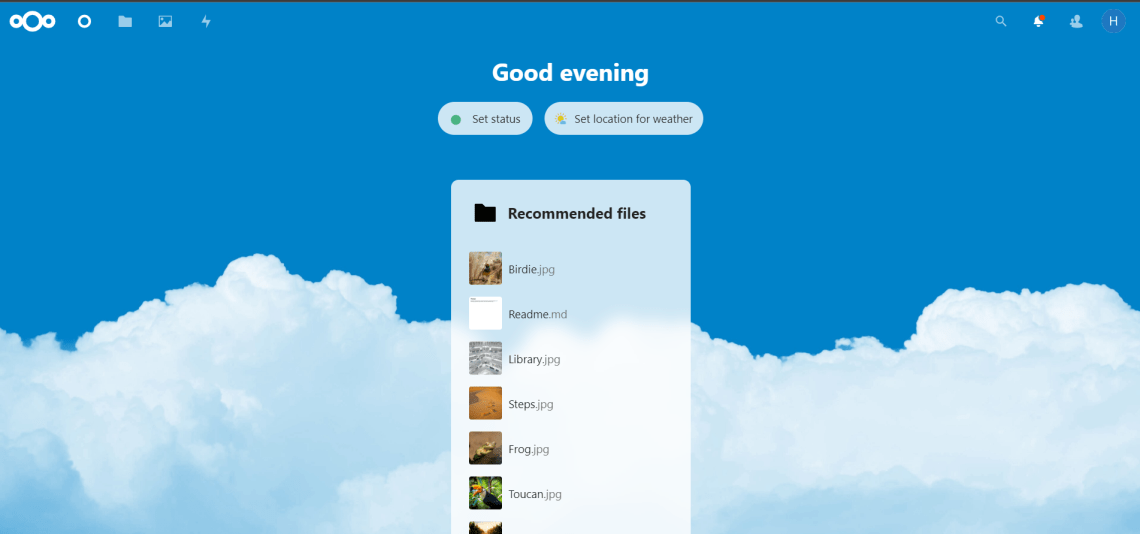
Nextcloud juga dapat diakses melalui aplikasi Android yang dapat diunduh dari Google Play Store.
Penutup
Demikainlah postingan kami kali ini. Semoga dapat membantu Anda. Selamat mempraktekkan.
Mohon maaf jika ada kesalahan kata, dan terima kasih sudah membaca!