Hi Netly’ers,
We find a good article about RDP Port on a Windows VPS.
If you ordered a Windows VPS, you may want to consider changing your RDP port to one that is on a non-standard port.
By default, the RDP protocol utilizes port 3389, which is commonly bruteforced and/or scanned. Changing your Windows Server’s RDP listening port is an extra security step you can take.
In this tutorial we will go over how to change the RDP port on your Windows VPS.
- Log into your Windows VPS via the Remote Desktop Connection Client.
- Once connected to the VPS, start the registry editor. (Type regedit in the search area)
- Navigate to the following registry subkey: HKEY_LOCAL_MACHINE\System\CurrentControlSet\Control\Terminal Server\WinStations\RDP-Tcp
- Find PortNumber
- Click Edit > Modify, and then click Decimal.
- Type the new port number you’d like to change your RDP port to, and then click OK.
- Close the registry editor
- Allow the new port number in your Windows Firewall settings
- Restart the Windows Server.
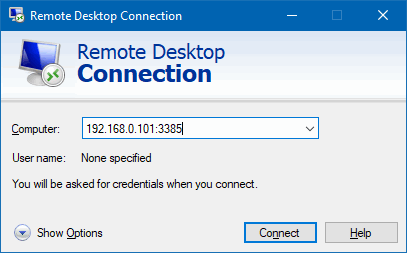
After the server has finished restarting, you will notice the server no longer responds to RDP connections on the standard port, so you will now need to specify the port when connecting via RDP. For example, VPSIP:PORTNUMBER
Do you change the RDP port on your Windows VPS? What other security measures do you take when deploying a Windows based server? Leave your feedback down in the comments section below!